Saturday, August 29, 2009

set in stone

one of the biggest dilemmas Mr. Ramen and I have faced with our manzanita branches (and let's just say there have been NUMEROUS dilemmas, including cleaning the branches, scraping all of the bark from the branches, trimming the branches... etc) was how to get them to stand up.

while it is easier to transport the branches if they are free and not attached to anything, you run the risk of the centerpiece tipping and falling on your Aunt and her dinner at the reception, especially when you want to hang things from the branches. which we of the simple taste (HAH!), of course, do.
we ran a few dry runs of sticking the branches in a vase, and placing a ton of rocks around the branch to secure it ... this was not exactly a success. so i began to scout for inexpensive ways we could secure the branches. we had met up with the owner of blooms and branches * in rancho cucamonga (he's a really sweet man) back in July, and he had suggested either plaster, or this yellow foam sealer/insulation in a can. since we wanted to put the branches in glass vases, we decided to go with the plaster, and used these directions that you can find on nettleton hollow's blog.
we purchased the biggest bag of plaster from home depot and borrowed a few plastic containers from my mom. we used a small bucket to mix the plaster in - don't worry if the plaster dries in the bucket - once it's dry, you can just thump the bucket on the ground a couple of times and the pieces will fall out, leaving the bucket good as new!
(in case you were wondering, our manzanita branches are organic/green! - they're almost all silverwood manzanita, so they are actually dead growth that is trimmed or has fallen off of the tree. ok, so i'm not all "gooooo ORGANIC!" for our wedding, but the gray color actually matches our decor best....)


with the first set of centerpieces... make sure you have plenty of space to dry the plaster outside - you will need a wall/chair/basketball pole/person to lean the branches up during the drying process, about 30 minutes. i didn't want to use up all of my mom's prized plastic containers, so we used 3-4, which meant this took us a loooooong time. good times!


after a few firm pulls, the plaster base pops out! we were a little surprised by how HOT they were! something about the chemical reaction of the plaster powder with water. our plaster set pretty fast, since we used hose water, which was rather warm due to our 110*+ weather in Phx. most of you will probably not have this problem. if you need more time, which i suggest, use cold water! Also, do this outside, as it can be a bit messy, and plaster powder is carcinogenic, etc. (Yeahhhh, we read the label AFTER we had probably accidentally inhaled 1/4 cup of it....)


a close up of the base: it's not really pretty, but it keeps the trees really stable, and will be covered by river rocks in the vase. If you want them to be smoother, again, use cold water, set those babies really fast, and you can smooth it out with a knife or spackling tool.


our finished products! you can see exactly how HUGE the 2 trees are - that's a wrapping paper container right next to them. i actually want them a tad taller, so i might get 2 column/platforms for that purpose.


our little manzanita forest! don't worry - before i left for school, we put ALL of the trees in my bedroom to store, so my dad would be able to have his nice clean house back. now we just had to figure out how to decorate them, and how to transport them....

* if you are in SoCal or Phx and want some manzies of your own, I HIGHLY suggest going to the Blooms and Branches warehouse. You just make an appointment, and you can handpick your pieces right there, AND save on shipping!
**
It may be cheaper to just buy some branches from someone who grows them, but you have been warned: it takes a TON of time to get them to be presentable...

they're fluffity! they're puffity! 1, 2, 3, 4, 5!

yes, i used to watch homestar runner in college with my friends. no shame in that. but this post is not about marshmallows... it's about pomanders! yes, giant balls of fluffity tissue paper flowers! and yes, i ignorantly volunteered myself for this project. (warning! picture-heavy post!)


the infamous tissue paper pomanders from amanda of vintageglam! - btw, she's AWESOME, and totally gave me some tips on her process and ordering tp...

like pretty much every bride out there, i quickly, madly, deeply fell head over heels for this project. i know there have been many tutorials on how to make these, so, i'll keep mine to a minimum. i basically followed ms. martha's instructions on folding the paper flowers. but before we delve into that world, let's have some fun with some inspiration pictures, shall we?


this lovely fluff ball is hand-dyed coffee filters!!!!! so gorgeous. via alice from paintedwhite.com.

i actually contacted alice for some advice/tips on dying my own coffee filters. after burning through a pretty hefty stack of my dad's costco pack of filters, i learned that i do not have the immense skill of arranging coffee filters nicely, nor did i desire to dye anymore. so i gave up on this attempt. (message me if you want to learn, bc i'd be more than happy to share!)


i googled "aisle pomanders", and this lovely picture came up... i think these are probably real flowers, which i can't even begin to IMAGINE how much those would cost... i wanted to see what aisle pomanders would look like in an alternating pattern....


here
hanging pomanders! if we were having our ceremony outside, you can bet your bottom dollar that i would have made a million of these teeny poms (but out of tp) to hang. alas, we are having our ceremony in a church... so i resigned myself to hanging a few tiny ones from our aforementioned manzie trees.


uhm, are those moss poms to die for, or what?!? sighhhhhhhh. i was inspired by this, but decided to not attempt this, as i have NO idea what i'd do with a giant moss ball. but it's still sexy to look at. **SIGH**


so everyone has seen the flowergirl pomanders, right? so yeah... the fiance and i looooove the look of pomanders, so we wanted our two sweet little flowergirls to carry them. i'd LOVE to be able to do real flowers but again, i'm totally not qualified for that, and secondly, the cheapest quote i received from a florist was about $55/ball. We're talking carnations and a 4" ball. uhhhh. EXACTLY! my cousin who recently got married sprung for a real rosebud pomander for her fg (who is also one of mine!), and while it was lovely, the petals were already browning by the time the ceremony took place.... so that kind of confirmed my crafting plan....

yup! i made them out of fake flowers. I made one with pink peonies and hydrangeas, and the other with white hydrangeas. because flowers are fluffity, you should shoot for a smaller styrofoam ball (i learned the hard way). I used 4" balls with 22-24g wire for the flowergirl poms, and about 6-8 peonies, and about 3 3/4 stems of hydrangeas. floral clearance at joann's and michael's are my best friends.


notice the "joy" on my face. this was about 35+ minutes and 4 glue gun burns from the first pom...


the smaller pom: i cut the buds off, but kept the stems. I tried to cut them off in bunches, as long as they were roughly the same height. i then wired the bunches together, to get a dense cluster.


you can kind of see the wiring here.... I would put a giant blob of hot glue in the spot that i wanted (generally underneath another cluster) and then shove the wire through the glue and press the stems into the glue to be secured.
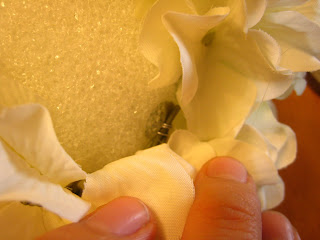
for the peony pom (sorry, i forgot to take pictures), I basically pulled the blooms off of the stems, poked a hole in the foam with the stem part that was still attached to the petal portion, filled the hole with hot glue, and then stuck the flower back into the hot glue. you have to hold it for a couple of seconds because they're pretty heavy and can fall out if the glue hasn't dried yet. i filled in the gaps between the peonies with some pink hydrangeas. if you are using large blooms, i'd recommend planning out where the flowers will go prior to gluing them down as we had a few re-do's in order to keep the pom from looking oddly sparse on one side.

the finished products! as you can see, the white one came out smaller, even though the balls are the same size; this is because the peony blooms are HUUUGE! oh! another tip - it's always smarter to attach the ribbon handle through the ball BEFORE you attach the flowers. but i had forgotten to buy the ribbon, so i ended up doing it later. (Mr. Ramen was actually hard at work on our STD and website design at this point. i love that guy!)
now for the tissue paper poms, i started on this project by myself, with the aid of my lovely sister, and one of the girls from my church's youth group. after the coffee filter fiasco (see failure story above), i decided to go with the tissue paper route. i was hesitant to order tissue paper online, because i knew i wanted a particular color. and i also didn't know how much to order. so i used my mom's giant stack of el cheap-o white tissue paper and decided to use my tea+red food coloring dye to get the perfect pink. yes, i hand-dyed this tp. anyways, long story short, it took a long time, and i don't recommend anyone doing it this way, but luckily i live in the nation's dryest state, so that probably helped speed up the process.

the result: a giant mass of perfect barely blush pink paper. after this, i decided to just bite the bullet, and ordered birch tissue paper from nashville wraps. on a foray into the SF flower market with my cousin, i discovered this little floral supply warehouse, where they sold styrofoam balls for SUPER cheap. i actually ended up having my cousin buy 16 of the 6" balls and 2 of the 4" ones initially, and she brought it down to SoCal for me. after i learned that a 6" ball = 10" pomander, i sold my 14 unused balls and had my sister purchase 4" balls on her next trip to SF. because the price per ball decreases with a bulk purchase, she ended up getting me 20, for about $20 or so. i love flower markets.

so the plan was to make a pom to hang from every other pew at the church. there are about 15 rows. so... roughly 16 pomanders. faced with this ridonculous challenge, i did what any sane bride-to-be would do: i recruited all of my girlfriends, and had a folding/fluffing party!

hard at work.... seriously, i could not ask for better friends! one of my dear friends actually brought her new husband and brother-in-law to help out!


the results: 6 mini poms, plus 2 almost filled large shopping bags of fluffies! lest you think this was enough flowers, i probably filled up those bags at least 2 more times.... i can fold and fluff in my sleep. we probably spent 5 days straight doing this - but we spread it out over several weeks, so we (my mom, sister, fiance, and myself) were constantly cutting wire and paper, folding, and fluffing while we got caught up on almost the entire last season of heroes, lost, and chuck.


close up: don't worry, i put Mr. Ramen to work! he's such a trooper. aren't the pink poms sooo cute?


this is to show you how densely i packed my poms - and not TOO dense, mostly because we got lazy and didn't want to make any more flowers, and also because they looked pretty good loose. i also didn't use and hot glue because we figured no one was going to be swinging the poms (although we tested that), and the wire was reallllly secure. i suggest using about 4"/flower of thicker gauge wire (~ 22g) for these larger poms. we used probably a 24-26g for the baby poms and just cut the wire (and paper) down proportionally.


and here is what they look like! the birch tissue paper was a really nice thick high quality tissue paper, and had a nice creamy light ivory tone.


this was less than 1/2 of the poms we made... we ended up making ~20!


and a mockup of the decoration items we had made/purchased... just to reassure me that everything was cohesive.
one project down, only 1 million more to go!

work it!


lately, i've been finding myself SO caught up with wedding stuff, work (i work for a department office at my school), and school that i never get around to working out :(

now, i'm not the kind of girl that will starve herself. for anything. especially not a dress. and my dress already fits me (and actually needs to be taken in a little bit), but i'm also not the most naturally slim chick either. i've always been athletic and need to regularly exercise to stay toned (and sane).

so instead of depriving myself of food, i've made a few lifestyle changes... such as trying to eat more fruits and veggies, learning to just say "no!" to desserts and unnecessary sugar/fat (the exception would have to be yogurtland. ahhhh, tart yogurt, my love!), eating smaller portions, no snacking (except for fruit and yogurt), and walking walking walking whenever i can. i also try to hit up the gym whenever possible and bust through my standard ~ 3-4 miles on the elliptical in 30-35 minutes, and doing a little bit of abs and arms/back. i NEVER work out my legs because i have the world's largest calf muscles and i do NOT want them any bigger than they are. i kid you not, they are SOOO muscular, people always ask me if i played soccer and other such running-sports. and no, i didn't. so i try to lengthen them with pilates.
fun tangent (i swear this pertains to this subject): i used to run outside, until i got hit by a car last year. true story. really. i was running ON THE SIDEWALK and a woman making a left from the opposite direction hit me. i flew through the air and landed on my back. smacked my head (i like to think this was why i bombed that one final that quarter...), scraped up my arm, and got a pathetic bruise on my leg. i've started to think that i'm indestructible, since i didn't even break anything, and i've gotten worse bruises from walking into my bed. the good thing about this accident is aside from having a cool story to tell, it paid for my wedding dress. anyways, for this reason i am no longer allowed to run outside. hm. i guess my life is more exciting than i thought.

back to our usual programming:
i recently did a few P90X videos with my friend and her fiance. i've only done the yoga and cardio/kickboxing videos and i loooooove them! i'm fiercely competitive, so working out with other people always motivates me to push myself harder (as long as we're doing the same thing, like a video). yeah, i'm not sure why i'm so crazy about beating other people at stuff like that.... but at any rate, i can TOTALLY see a difference in my body just by doing that, and they do lots of warmup and stretching, so i was really barely sore after those videos. i just felt so good afterwards and healthier! so i might try to throw those in the mix to keep my muscles "confused", and also just for fun.

i've noticed lots of brides drop a TON of weight for the wedding, only to gain it all back on the honeymoon, and i didn't want to do that. i decided that a steady weight loss would be my goal, and i'd be shooting more for health/tonicity than anything - something that would last further than just the wedding day. i'm hoping that more brides will focus on their long-term health, than just the short-term benefits of crazy deprivation diets and work-out regimes!
what lifestyle changes are you making to get fit? have you tried p90x?? have you ever been hit my a car running outside????

Friday, August 28, 2009

rejection letters...


we haven't sent out our invitations yet, but i've already received a few "no's" from friends after sending out our STDs.... it's this mixed bag of emotions. on one hand, we do need some people to say "no", so we don't go over our max capacity, so that's good; on the other hand, you DO like these people, so you WANT them to come (i mean, after all, that's why you invited them, right?). of course, there are those "obligation" invites that you WISH would tell you they couldn't come, but of course they would make the time (come on, I know you all have those people on your guestlists).

so why am i thinking about the "no's" already? i just received an email from a friend we had asked to run sound at our ceremony and reception. this friend is REALLY talented at what he does, and i was really looking forward to having him there... and introducing him to some of my single friends (haha). here is the twist: there's ANOTHER couple in Phx getting married on our SAME date. yeah, i know, date twins are no big deal (and NO this is not bride wars 2). BUT! the big deal is more that we have a lot of mutual friends... as you can imagine - there's some conflict for those who would be invited to both. at any rate, several months after we had asked him to help out at our wedding and he accepted, the other couple asked him to usher at their wedding. so i decided to be gracious and told him to do whatever he wanted, that we would love for him to be at our wedding, but i understood. in short, he chose to go to the other wedding. SO... that leaves me back at square 1 for sound.

and again... back to dealing with rejection. again, i'm reminding myself that MY wedding isn't the sun, and life does not revolve around it. or me. i know that regardless of who is able to make it or not, mr. ramen and i will enjoy ourselves and have a super memorable day. yes, i'm disappointed, and yeah, you want your favorite people to be able to celebrate this pretty freakin' big deal occasion with you, but.... as long as my family is there and we're all healthy, i'm good.

Thursday, August 27, 2009

gratuitous body shots

ok, so they're not really body shots, but they are WAAAAAY sexy and who wants to see my body anyways? so..... here is my sexay ring, as requested.


one of the engagement pictures my dear friend becca shot for us (more on that later!)

and yeah. these pictures aren't so clear BUUUUT.... they're just soooo cute! (my sister and i had an e-ring photo session the night i got engaged... we went a little nuts). gooo macro!


my cushion cut baby, in all of it's micropave haloed glory. (It's a Christopher Design which is why the cushion cut is a little unusual)


the boy did good. real good.
I like to clean my ring with a little bit of Mr. Clean mixed w warm water, and an old soft toothbrush....and I scrub verrrrry gently. What do you use to clean yours?

evolving: part 3!

So... there are ups and downs to having a fiance who by trade is a designer. It's awesome because there are SO many crazy benefits (have i ever mentioned that Mr. Ramen works for Xyron???) From cool materials, to a personal design-slave who can carry out my every wish in illustrator and other design programs, to access to sweet tools like a laser cutter (which may be put into action).... etc.

One of the downsides is that the man seriously has an opinion on evvvverything. This can be good, but sometimes he really gets stuck on one thing that he likes, and I just can't fight him. Well, I usually end up caving in to him. But he has a good eye and he's a good sounding board for my crazy ideas. So this works perfectly.

Anyways, from the beginning, I knew that I wanted some variance in centerpieces. When you have ~35 tables to decorate, you get to expand your creativity. Back when we were thinking of working with a florist, we decided that our 18 "low" centerpieces would be simple.

Enter, the floating bowl. Filled with water, rocks, and some pretty blossoms and a few floating candles. Cute, simple, chic, elegant.... a touch of vintage, but still modern. Notice one minor detail: CANDLES!!!! Darn it, flammable artwork! Anyways. We nixed this idea when florists began quoting me $30/table for this little sucker. And the fact that I couldn't even have some candles kind of killed the love affair. (but can someone else PLEAAAAAAAAAAAASE do this and then email me the pictures? thanks)

When we were contemplating the whole "branch with lanterns" thing, we thought about incorporating table number lanterns into the low centerpieces as well (you know, to have a cohesive look). Something in the order of this:
Problems: It was a little TOO organic, we can't have potted plant type things (so no wheatgrass), and the bottles were a little too vintage/kitschy/cool for us. And it didn't really flow with the whole manzanita look.
So.... I decided to reconsider submerged orchids. This is a look that has been really popular in weddings for quite some time. And for good reasons - it's pretty, it's cheap, and... uh, yeah, it's cheap. And it was precisely the look that my designer fiance agreed would work into our modern-sexy-vintage-romance look...... and the manzies.

And once I stumbled upon this baby.... it was all over. I knew this was EXACTLY what I wanted. Our little spin on this trio is our platform is black and slightly bigger; the mid-sized vase is actually going to be frosted and filled with battery-operated tealights (sighhhhh, oh the sacrifices!), and the smaller vase will contain one large cymbidium orchid (i think... unless I change my mind and go with all dendrobiums... which is possible). Oh - and the orchids will be white dendrobiums w a slight blush pink center. And again, no open flames. Sigh.

Oh yeahhhhh, can you feel the sexiness? I'm terribly excited, and will post our mock-ups of our centerpieces for you once we get all the materials together. So there you have it - our completely evolved centerpiece species.Don't worry - you can look forward to learning about how we decorate the manzies and did all of this ourselves. with a lot of help and love from some cousins.
Are you doing more than one type of centerpieces? Anyone else frustrated with the look of those battery-operated tealights?

Tuesday, August 25, 2009

evolution, part 2

so..... knowing that real floral centerpieces were out of the question (budget-wise, as well as style-wise), i became EXTREMELY interested in branches....

i was inspired by this curly willow setup... and wanted to incorporate my beloved paper lanterns.... and my genius idea was to have a tall cylinder vase of curly willow with 3 white paper lanterns, and to paint the table number onto one of the lanterns. genius right? right!

Mr. Ramen and i were convinced we were going to do curly willow... until meeting with our now florist who suggested Victorian birch - which we promptly fell in love with...


until i introduced Mr. Ramen to the wonderful world of manzanita. i never in a million years had ever seriously considered manzanita - because however lovely it is, i'm not a frou-frou kind of girl (and let's face it - all the dripping flowers and hanging candles do have that fancy foofy look...) AND i also don't have $50-75 x 17 to rent some nekkid branches. i had initially fallen in love with the twisted organic look of the branches, but gave up on it in the name of practicality.


some frou-fer-y manzanitas... lovely, but VERY not us.


some examples of non-froufy manzanitas!!! verrrrrry us!

while researching various options to purchase birch branches (ranging from nettleton hollow, to forays into the SF and LA flower markets) i learned that manzanita could actually be affordable. ***GASP*** no. i am not lying to you. You can get some nice lookin' branches for ~ $7 at the LA flower market (about 12-16")


i found a bride on project wedding who actually was selling manzanita from her brother's property really cheap. unfortunately, i wasn't able to get in contact with her, so i quickly looked into other avenues. such as where i could go in arizona and cut down some branches. after i learned this was most likely highly illegal, i began to search for used manzanita online. and on Craigslist LA, i found a guy in the Antelope Valley area who had some manzanita trees on his property and wanted to help out brides....

Saul is THE BEST! he was totally willing to work with us, we got to pick out EXACTLY the size and shape of the branches that we wanted, and he even threw in an extra one "just in case". We spent less than $200 buying 17 centerpieces (all around 36"+), 1 medium sized (~ 40") tree for our escort card table, and 2 rather large (48"+) trees (to be used to decorate the alter and later beside our sweetheart table). and a bonus branch or 2. after trimming the larger trees, we could probably muster up 2 extra centerpieces. i know - awesome right???? yes, i died a million happy little deaths of joy.

the back of the minivan FILLED... before we even had loaded my stuff to bring back home!

the only major issues were transportation and storage - fiance and i somehow stuffed all the trees and branches into my parents' minivan (WITH a ton of my things) when i moved all of my school stuff out of my apt in SoCal, into storage or back to AZ. we kept the branches in my parents' house and garage until we were ready to get them ready to be centerpieces.
my living room filled with wedding things... i think my dad wanted to kill me after 2 1/2 months of this...

So keep in mind we are expecting about 350 guests.... so this means 35 tables. so what about the other 18? come back for episode 3! (hey, all the best things come in trilogies right?)
did you have any "surprise happy endings" in your planning journey?